Never Lost - Just Exploring

Never Lost - Just Exploring
Click for slideshow

Wednesday, November 21, 2012

Riding in the darkness

Daylight savings time means commuting home in the dark. In the morning on my way to work I am fortunate enough to come in after the sun has risen and the day is underway. The warming sunlight is welcome and easy to ride in as visibility is excellent.  However during these late fall days in Wisconsin it getes dark around 4:00 PM and I work until 5:00 or later so that means riding in the dark.

My ride home from the office takes me through some dark and dangerous areas as I pass from the more city like suburb where my employment is to the muchmore rural area I live. As I transition from one place to the next the traffic thins, and the street lights fade and the buildings give way to fields, trees and farms. During the summer it is very peaceful to ride away from the noise, hustle and bustle and congestion of the populace and into the calm countryside. In the late Fall  this brings with it a whole new danger especially once the hunting season starts.

The darkness hides the animals waiting in the ditches for their chance to cross the street. Deer especially seem to litter the shoulder during the fall as they become more active looking for a mate, finding food sources as the farmer harvests the fields, and in general keeping ahead of hunters who are seeking to have them as a trophy and sausage.

Of course this forces them to the roadway, and they seem to not be able to discern when it is safe to cross, often walking out into traffic without looking, and suffering the consequences of such dire actions. Dead deer carcass' are commnplace in Wisconsin in the fall from the many car-deer collisions and I worry about becoming a statisitic caught up in this folly known as fall rutting season.


Before adding driving lights
My only defense from a deer suicide is to se them coming. That means lights and more lights shining through the darkness to illuminate the deer well before they get to the road.  Several years ago I had a close encounter with one as I rode home while passing the remnants of a corn field recently harvested by the local dairyman. I spotted the deer standing not 5 feet off the edge of the road as I went past at 55 MPH. The troubling part was that I never saw it until I was nearly on top of it...!


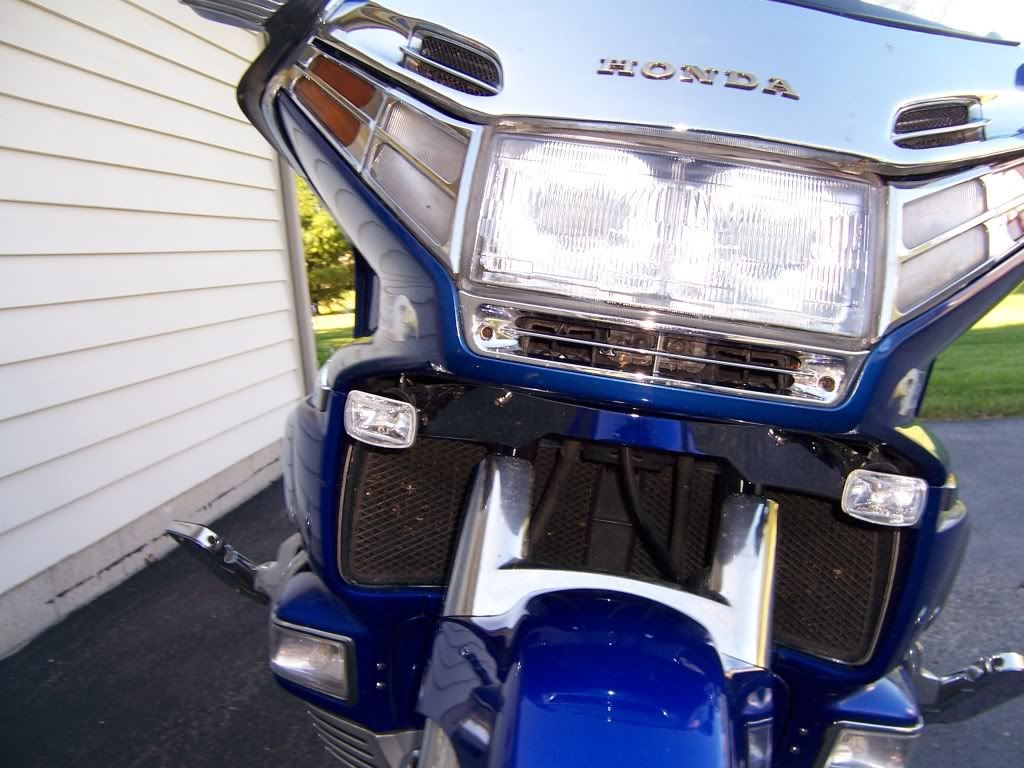
So I decided to add some driving lights. The Goldwing is equiped with some pretty decent headlights to begin with at 45W lows and 55W high beams. I had spent the extra money to upgrade these to 55/65 and the Silverstar high output bright white bulbs. There are 2 bulbs in the headlight assembly so running with my low beams on I had 110 watts of forward facing bright white light at all times. But that wasn't enoogh ...So I added some driving lights I found at Wal*mart. These Optronic Platinum Burners were rated at 55 Watts each and I mounted them to the front on a reshaped chrome trim under the fairing , just below the levelof the headlights.


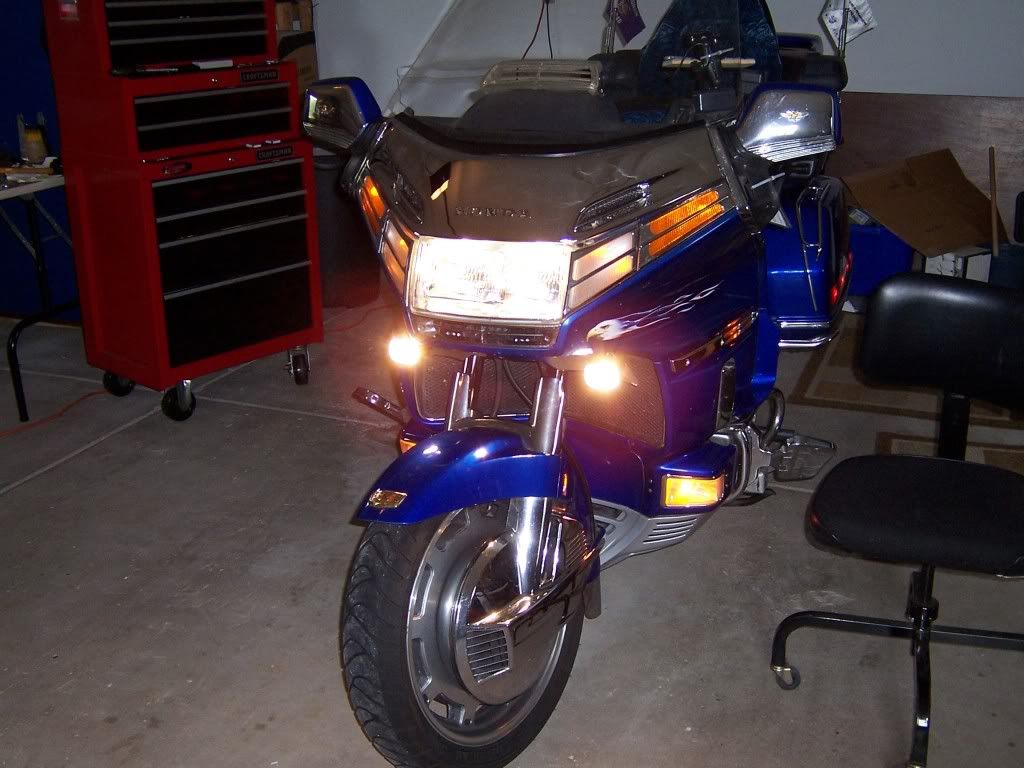
Driving Lights Mounted
NOW I had 220 WATTS of forward facing bright white light wioth just the low beams on. And I further complimented this arrangement by carefully aiming the Right hand side light outward into the ditches and fields to illuminate those pesky critters as they contemplated making a street crossing.

Another advantage is the average car driver; who would not be accustomed seeing a motorcycle out in the late fall typically, will easily see me coming as I am sure I must look like an airplane on final approach with landing lights blazing as I trundle down the roadway.

Wednesday, November 7, 2012

Resistance = Heat

Working on the GL1100 Interstate has immensely expanded my knowledge as I have been forced to learn more by doing. I feel the best lessons are the ones learned first hand, although sometimes I wish it was easier to acquire some of this knowledge.

The probelm presented itself as an intermittent headlight. It would turn off while riding at the oddest moments and then come back on at other times when it was unexpected. I spent hours and hours tracking wiring from the headlight bucket back, Fixing bad connections and poor splices as I went. And I thought I had it fixed - but whe I was test riding it for something else I was working on I noticed the Volt meter was reading higher than normal, and when I investigated I found the headlight was out - again.


So after some thinking and reading and discussing with fellow riders I figured out the problem must be in the fuse box. When I started to look closer I was shocked to find a badly corroded glass fuse connector on several circuits. And I realized these were the source of the problem. Often the bike would show voltage changing from high to low and this was showing the fuse box actually was allowing electric flow at differing rates as the fuses heated and cooled and the connectors all heated to very dangerous temps.


As I investigated further I soon saw the results of this loose fuse and corrosion as it created extreme excess heat and had started to damage the fuse box itself. This really worried me as I had to resolve this problem before a fire started and someone got injured.  The only thing I could think to do was to replace the entire fuse box - and in the process I wanted to update the fuses to modern blade style automitive fuses so I searched out an alternative box to add to the 1980 Goldwing.  The challenge was to find a box that allowed for ganging the first 4 lines together (a procees known asa "bus") as seen on this photo - see the bar along the bottom ?
 
This proved to be more of an effort than I first thoought - finding an inline 6 place fuse box with a bus or jumpers was almost impossible - in fact so difficult that I decided to create my own ganging line and use a 6 place inline box I found on Amazon. This required me to make a 4 line connector that leads from the 1 main power wire to 4 seperate fuses - so my meager soldering skills were put to the test. I elected to solder and heat shrink everything I could as I built the new fuse box in order to keep it as safe as possible for the future.
 
I simple then cut one wire at a time and created a new line into the fuse box with crimped connectors and shrink tubing all covered in a protective wrap of electrical tape appropriately colored for hot (red) or ground (black).  These crimp connections are not ideal (soldered is better) but I have alot of confidence in my crimps as I have experience with them on my old 1200 and on my current 1500 and I have learned how to do them so they will last.  Here you can see me preparing to make one of the first cuts as I worked my way across the fuse block.
 

Eventually I was able to get all the wires reconnected to the new block and even added some extra accesory slots on the far right for adding low amperage electrics like GPS and radios and auxillary lighting witrh LEDs. Once this was done I took the bike out for a test ride and noticed almost immediately the power was better, the lights were brighter and I knew I had made an awesome upgrade on this old but new-to-us bike.