
The probelm presented itself as an intermittent headlight. It would turn off while riding at the oddest moments and then come back on at other times when it was unexpected. I spent hours and hours tracking wiring from the headlight bucket back, Fixing bad connections and poor splices as I went. And I thought I had it fixed - but whe I was test riding it for something else I was working on I noticed the Volt meter was reading higher than normal, and when I investigated I found the headlight was out - again.

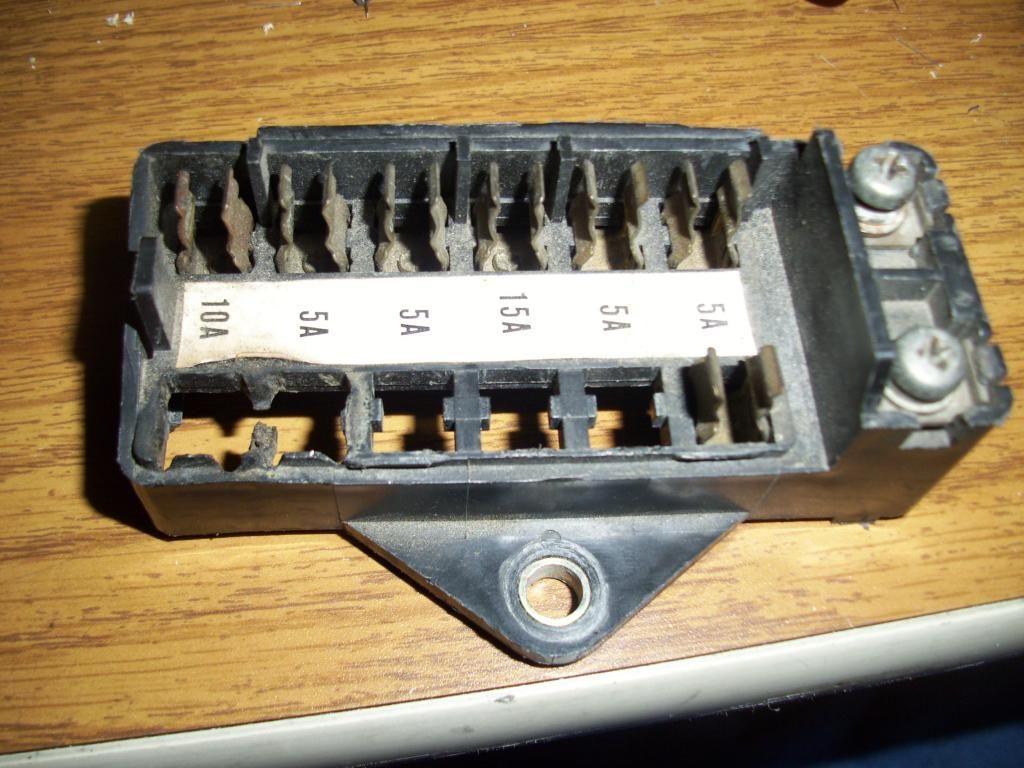

As I investigated further I soon saw the results of this loose fuse and corrosion as it created extreme excess heat and had started to damage the fuse box itself. This really worried me as I had to resolve this problem before a fire started and someone got injured. The only thing I could think to do was to replace the entire fuse box - and in the process I wanted to update the fuses to modern blade style automitive fuses so I searched out an alternative box to add to the 1980 Goldwing. The challenge was to find a box that allowed for ganging the first 4 lines together (a procees known asa "bus") as seen on this photo - see the bar along the bottom ?
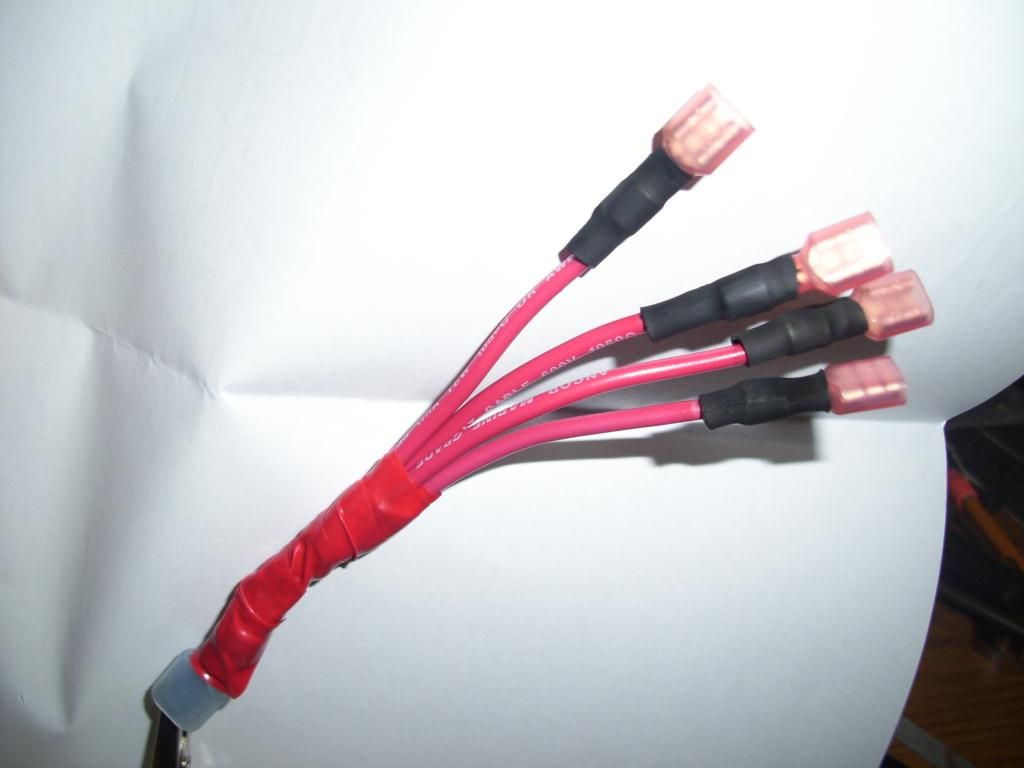 This proved to be more of an effort than I first thoought - finding an inline 6 place fuse box with a bus or jumpers was almost impossible - in fact so difficult that I decided to create my own ganging line and use a 6 place inline box I found on Amazon. This required me to make a 4 line connector that leads from the 1 main power wire to 4 seperate fuses - so my meager soldering skills were put to the test. I elected to solder and heat shrink everything I could as I built the new fuse box in order to keep it as safe as possible for the future.
 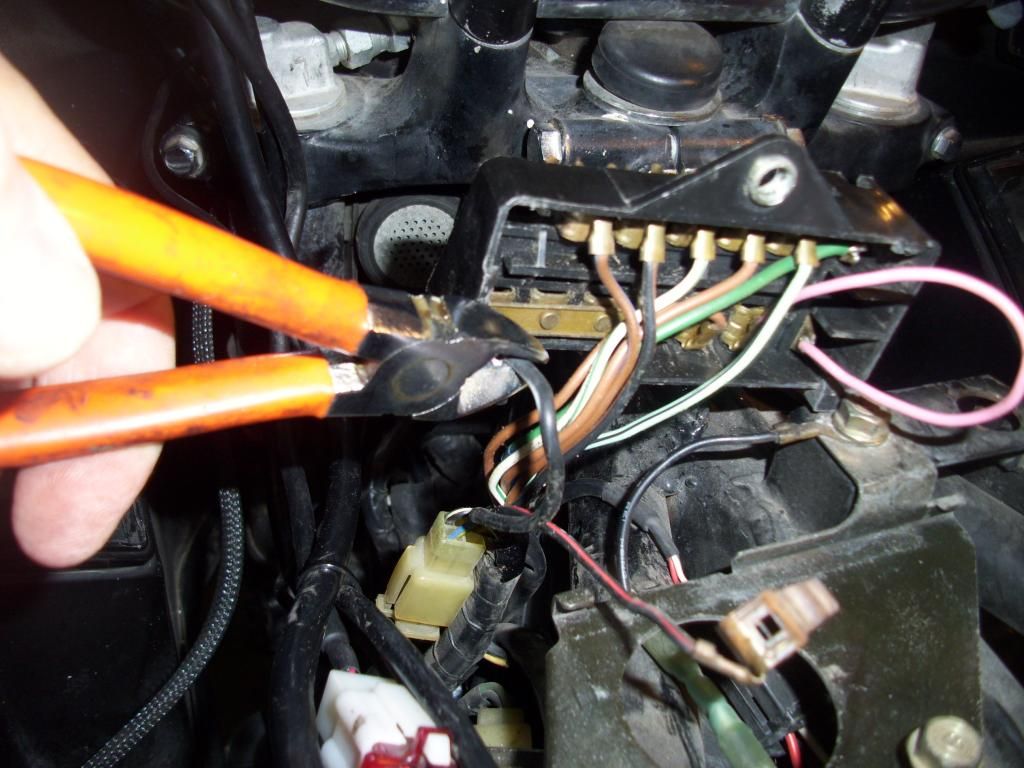 I simple then cut one wire at a time and created a new line into the fuse box with crimped connectors and shrink tubing all covered in a protective wrap of electrical tape appropriately colored for hot (red) or ground (black). These crimp connections are not ideal (soldered is better) but I have alot of confidence in my crimps as I have experience with them on my old 1200 and on my current 1500 and I have learned how to do them so they will last. Here you can see me preparing to make one of the first cuts as I worked my way across the fuse block.
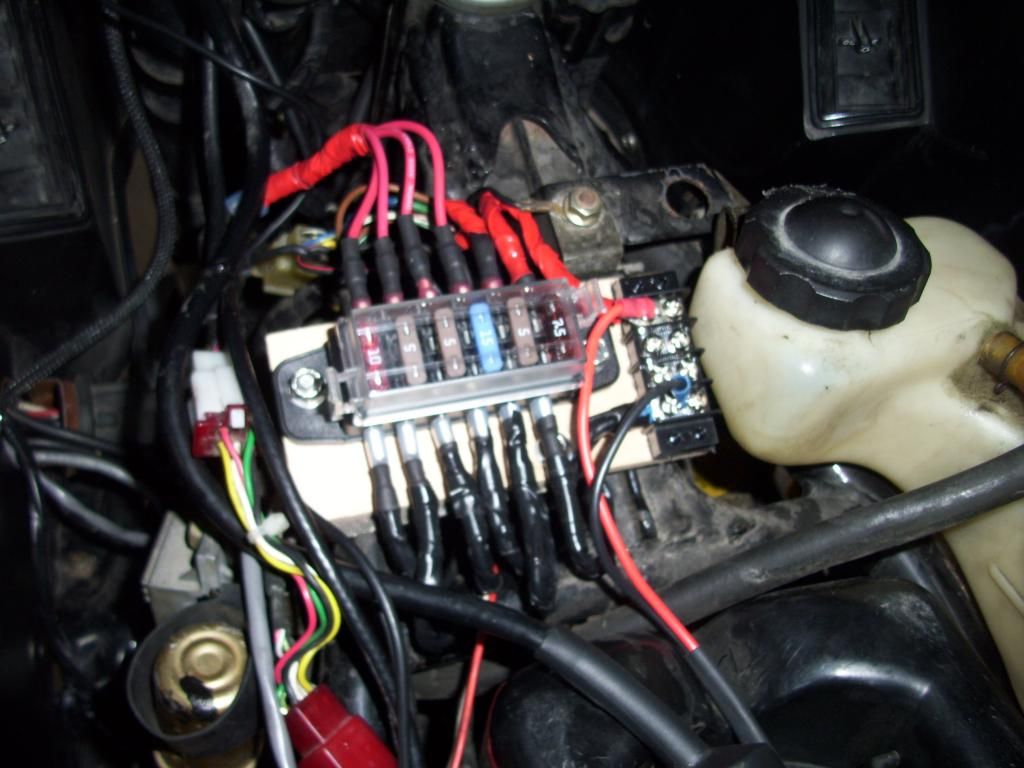 Eventually I was able to get all the wires reconnected to the new block and even added some extra accesory slots on the far right for adding low amperage electrics like GPS and radios and auxillary lighting witrh LEDs. Once this was done I took the bike out for a test ride and noticed almost immediately the power was better, the lights were brighter and I knew I had made an awesome upgrade on this old but new-to-us bike.
No comments:
Post a Comment